Showing posts with label Pixlr blog. Show all posts

Sunday, September 15, 2013

Lesson 11: "BASIC" How to Replace the Color of an Object in Pixlr

 Lesson 11

"BASIC" How to Replace the Color of an Object in Pixlr


The car example for color replacement included more advance tools and I decided to make a new tutorial for basic level. This tutorial does not consist more than Lesson 4.


Getting Started

1) Open Pixlr Advanced

2) Open an image that you want to replace it's color,
     http://hypebeast.com/image/2009/05/selfridges-coca-cola-centenary-bottles.jpg


Pixlr Color Replace Basic

Replacing Color 


1) Go to the Tools Menu which is on the left side of the screen and choose the Color Replace Tool.

2) Select a color by clicking set main color. (At the bottom of that Menu)

How to Replace the color of an object


3) Adjust the Tolerance according to color image and color tones. 

4) Select a brush size according to your object.

Pixlr Color Replace Basic


5) Start Replacing like painting the object :) 

Pixlr Color Replace Basic


Saturday, May 11, 2013

Lesson 9: How to Write a Patterned Text in Pixlr

Lesson 9: How to Write a Patterned Text in Pixlr


Getting Started

1) Open Pixlr Advanced

2) Click to Create a new image and create 800x600 sized image. (The 800x600 is optional)

Writing The Text  

1) Click Type Tool (T) on the Tool Menu and add the text that you want to make patterned. (Wide Latin, size: 103)


2) Use Move Tool (V) to put the text at the center of the image

3) Go the the Layers Menu on the right side of the screen between the History Menu and Navigator. Right Click to the Layer which contains your Text and select Merge Down


4) Then, double click to the locker in the Layers Menu, near the Background text. It should turn to a checked box

Adding The Pattern Image


1) Go the the Layer Menu on the top of the Website which is in the black stripe near the Image Menu. After that, open an image from your computer or URL. My pattern's URL: http://3.bp.blogspot.com/-TgyfpYbTFz0/UBjatFWB7_I/AAAAAAAABg4/vW8CZU_NuW8/s1600/Hawaii-beach.jpg


2) There will be Layer 2 and Layer 0 come up in the Layers Menu on the right side of the screen. Go to Layer 0 which contains your texture and surround the Text with using Wand Tool (W)

TRICK: If you have a letter like A and R, Do not forget to surround the inner part of it with using Shift Button and Wand Tool (W)


3) Now, Scroll the Layer 2 to the Layer 0's place with grabbing and dropping with your mouse.


 4) When you get a image as in the picture, Use the Eraser Tool (E) and start to erase the background.


 Details


1) Go to the Edit Menu and press Deselect All (Ctrl + D)

2) Use the Layer Styles to give shadows of your text.


3) In the Layers Menu, right click to Layer 2 and press Merge Down.

4) Save it in PNG format from the File Menu.

Tuesday, May 7, 2013

Lesson 7: How to fix the parts that you don't want in your picture (Nevus, Freckle, Beard, Burn etc.)

Lesson 7: How to fix the parts that you don't want in your picture (Nevus, Freckle, Beard, Burn etc.)


Getting Started

1) Open Pixlr Express

2) Open an image that you want to fix a part of it. I am going to fix a nevus which is quite simple. URL:
     http://www.haber34.com/hr/cok-benli-uzun-mu-yasiyor--25577.jpg


Overlap the Nevus

1) Go to the Adjustment Menu which is the first square on the line.


2) Then Click on Touch Up 

3) Spots will be selected in the Touch Up Menu, Do not chance it. You can set the brush size according to your image size.


4) Go over the parts that you want to fix.


Sunday, May 5, 2013

Lesson 5: How to Make a Banner with Pixlr

Lesson 5: How to Make a Banner with Pixlr


Getting Started 

1) Open Pixlr Advanced

    There are very good free images, of course, you can find another pictures from other sites too...

3) I am going to use the images from these URL's;

4) First browse your background picture. (For me its lightnings)

How to make banner


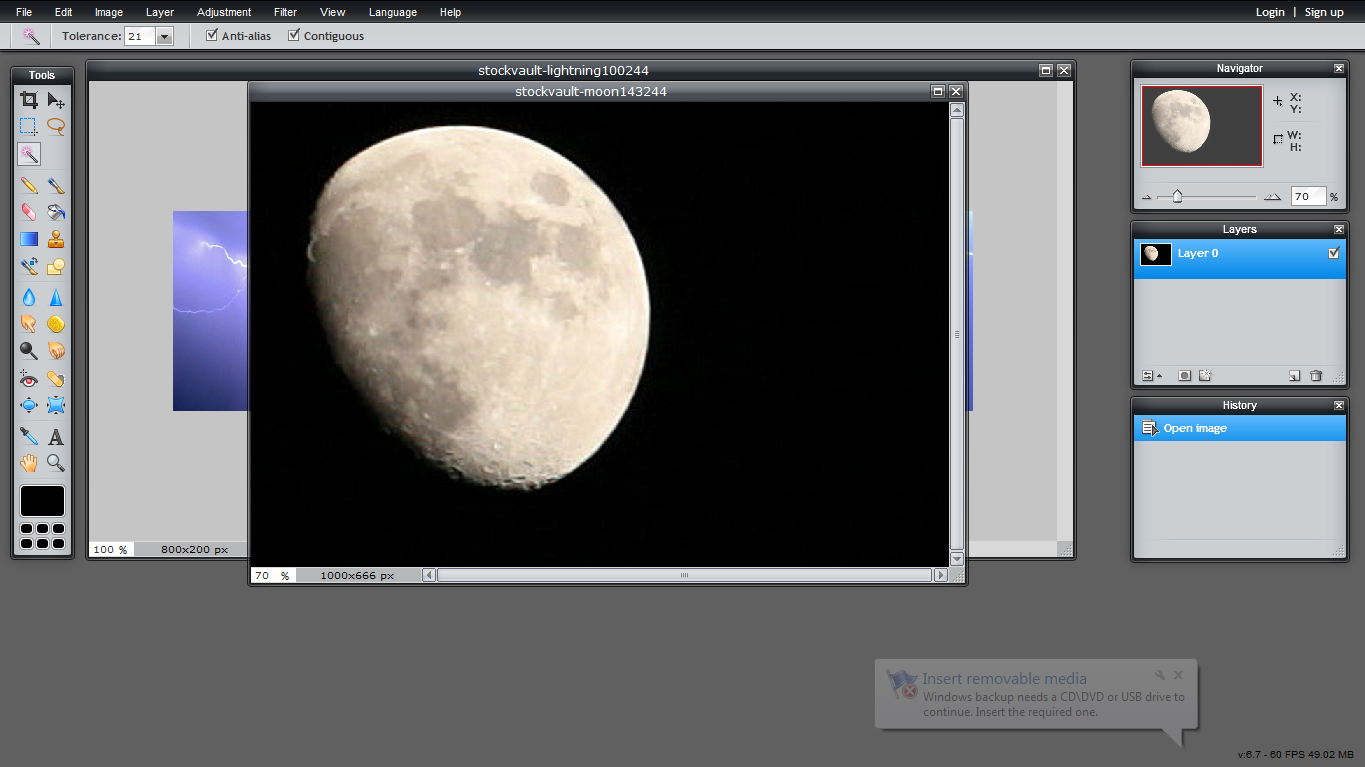
 Resizing as a Banner and Cropping Moon 


1) Open the Lightning image from your computer after downloaded.

2) Crop the image as you want (Lesson 1)


Cropping in Pixlr

3) Re size your image (It may change according to your usage) I am going to re size it 800x200
    Recall: Lesson 2

Pixlr Resize picture

Putting the Moon

1) Open the other image(s) that you want to apply to your background. I would like to put a moon image among the lightnings. 


Open image in Pixlr


2) Go to the Layer Menu on the right side of the screen and press the lock near the background writing. It will turn to a checked box.  


Pixlr Lock


3) Use the Wand Tool (W) or Lasso Tool (L) to capture the object that you want to put in your banner. I will use the wand tool because the colours are clear. If the colors are mixed like green and yellow the wand tool usually not capable to surround the object. Don't worry :) There is Lasso Tool for you.

Pixlr Wand Tool


4) After surrounding the the object that you want, press Delete button and background of the image will be checkered. Now, it is time to re size you object according to your background size. You have to use Free Transform (Ctrl + T) in the Edit Menu.


Pixlr checkered


5) Use Marquee Tool (M) to select the image which you will put in your banner (Moon), then copy it with using Copy (Ctrl + C) in the Edit Menu. 

6) Paste it to the Banner image by using Paste (Ctrl + V) in the Edit Menu

7) Use the Move Tool (V) to put it where you want

8) You can re size it with using Free Transform Tool (Ctrl + T) again but make sure that Layer 1 is selected in the Layer Menu on the right side of screen.

Pixlr Free Transform


 Adding Texture 


1) Click on the Type Tool (T) on the Tool Bar. 

2) Select the place that you want to add texture on the banner. Do not worry if you missed the exact place, because there is the Move Tool (V) which is quite helpful. 

3) You can arrange the Font, Style, Size and Color in the Type Tool Menu

Pixlr Font Size Color


4) It's done. Save you new banner from File Menu. 


How to make a banner in pixlr

Saturday, May 4, 2013

Lesson 4: How to Replace the Color of an Object in Pixlr

Lesson 4: How to Replace the Color of an Object in Pixlr


Getting Started

1) Open Pixlr Advance

2) Open an image that you want to change the color from your Computer or URL:
     https://blogger.googleusercontent.com/img/b/R29vZ2xl/AVvXsEi9Wb5GYHjKhiVt6kDtr6JEpX0_vraEdDxVtPA0Tl2OR_4Kx35j46dHVgS9-9-d52EVSo8d-tO7B7yKSsPgo0Z78q2wekZqZq782ajguGiBa-Q_JsXYkAKtCh0UGE1u_gSqrENaWuilotM/s1600/chevrolet-camaro-production-2010-yellow-nose.jpg

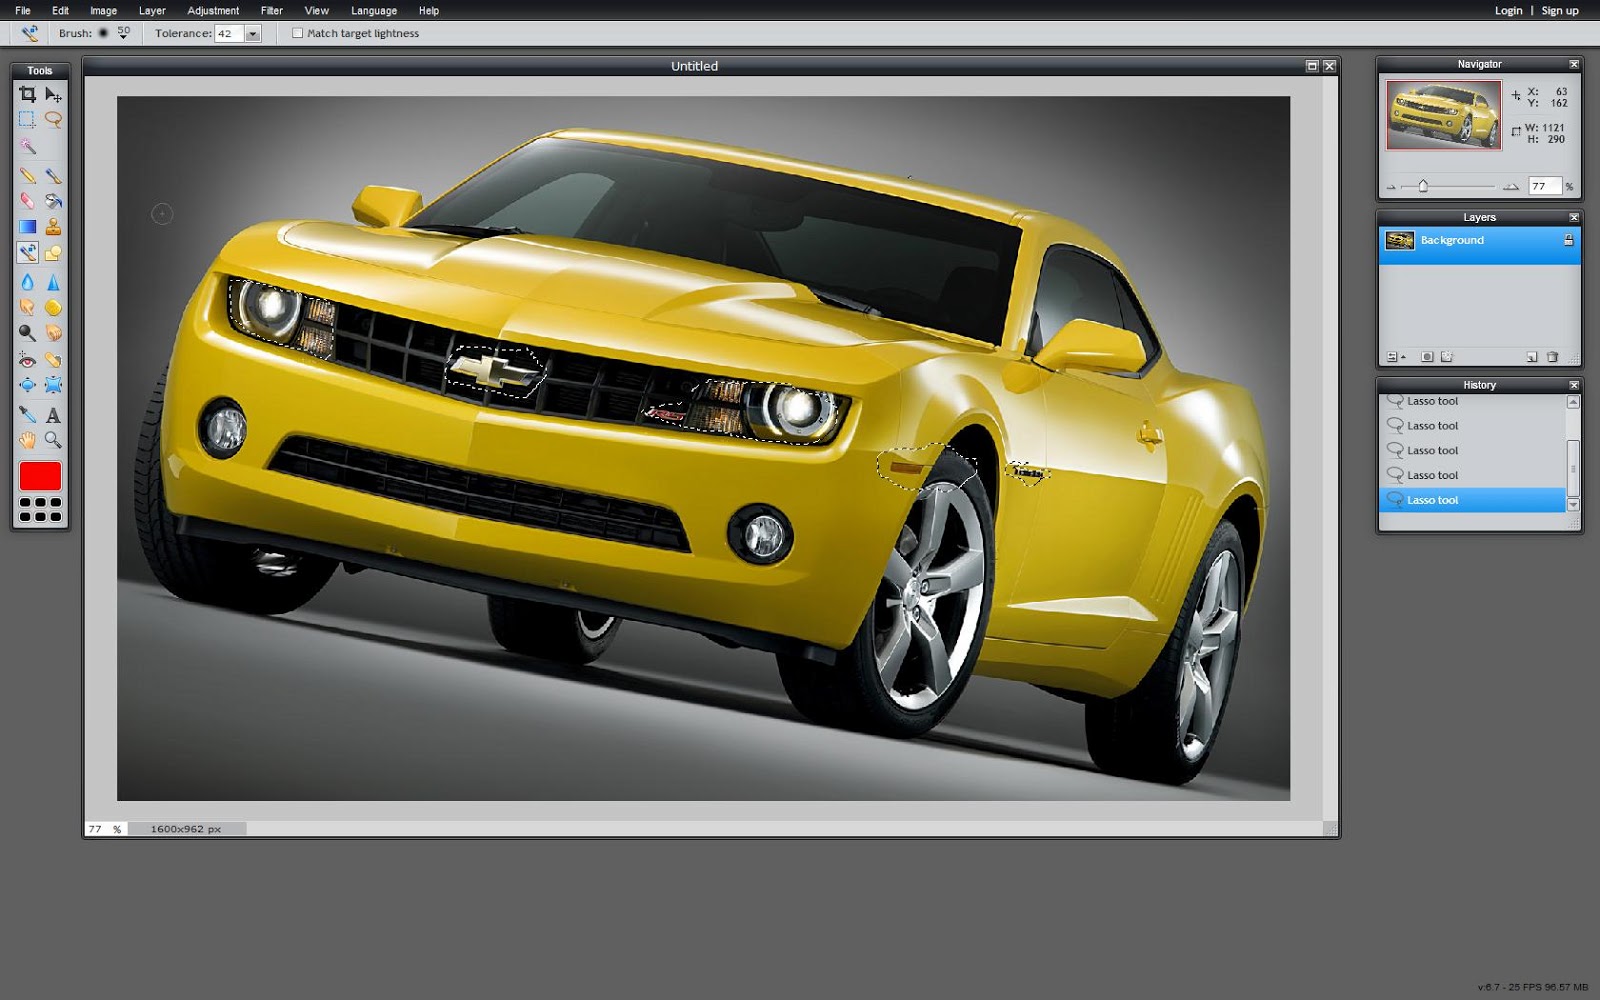
Pixlr Yellow Car

Selecting the Parts You Want to Keep


1) Click Ctrl + A to surround all the image.

2)  Then, click on the Lasso Tool (L) and by pressing CTRL button all the time surround the colors you want to keep and similar with your original color. For example; I am going to change the yellow, but there are few points I want to keep like Chevrolet emblem.


Lasso Tool Pixlr

 Color Replacement


1) I selected the parts I wanted to keep. Then click the Color Replacement Tool which is in the Tool Menu on the left side of the screen. (Look at Lesson 1)

2) Choose the color you want to do from the Color Selector at the bottom of the Tool Menu. (Look at Lesson 2)


3) Set the Brush Size at the top of the site in the gray stripe. (Look at Lesson 3) Then Start to replace the Color :)

Lasso Tool in Pixlr


4) To get rid of the lines from Lasso Tool go to the Edit Menu, then Click Deselect All (Ctrl + D)


Pixlr color replace change


Friday, May 3, 2013

Lesson 3: How to Change the Eye Color in Pixlr

Lesson 3: How to Change the Eye Color in Pixlr 


Changing the eye color in the image is a simple however, there are few tricks. I will highlight them to reduce the incorrect moves. Of course, we have very friendly, helpful tool which is Undo (Ctrl + Z)

1) Open the Pixlr Advance

2) Open an image which has a clear eye color. I will use the image in this URL: http://www.desperatehousecows.com/wp-content/uploads/2012/12/eyes1.jpg

eye color change

3) If the eye is not so clear try to change the image size or zoom in to the eye. It is not necessary for my picture. You can use the Zoom Tool (Z) or Change the image size which is Lesson 2.

4) After getting a clear eye image use the Lasso tool (L) to surround the eye.  It could be hard to do that at first but your hand will get used to it. 

Eye color change

5) Go to Edit and Click Copy (Ctrl + C)

Pixle eye color copy

6) Open a new layer from the Layer Menu on the right of the screen and middle of the Navigator and History Menu. You can open a new layer by clicking the new layer button near the Trash image (Delete layer)

pixlr layer menu

7) Then Click Paste (Ctrl + V) in the Edit Menu

8) The eye image that you surrounded by Lasso Tool will show up. Then use the Move Tool (V) to put the eye in the exact place as original

Pixlr Color selector

9) After moving the new eye in the original place. Open the Color Selector which is shown in the previous picture. Then choose a color


10) Click on the Brush Tool (B) which is at the Tool Menu and arrange the size of the Brush according to your eye size. You have fit the eye on the brush. You can arrange the size of the brush bu using the gray strip under the Menu. (Top of the Website). Use the Diameter tool in the Brush menu.

Brush diameter set

11) After getting the exact size of the brush on the eye click once. The Eye will be the color that you choose before.
Brush use in Pixlr


12) Click the Toggle Layer Settings in the Layer Menu. A menu will be show up Click to the Normal and make it "Darken". Then arrange the Opacity above the "Darken" menu as you like.

Pixlr Darken opacity

 13) Ta da!!! Green Eye :) :) :) 
        I changed my mind last minute

Pixlr lessons


Additional image for #12: 


Thursday, May 2, 2013

Lesson 2: Resizing Images

Lesson 2: Resizing Images

Resizing is an important skill for image editing because usually images are not at the same size as you like. There are several ways to do it. I will only show two ways to you.

I. Way


1) Open an image from URL or Computer
   My picture's URL: http://assets.dornob.com/wp-content/uploads/2011/03/real-floating-balloon-home.jpg

How to browse image
 
2) Click to the Image Button on the upper panel, then press Image Size

Pixlr Image menu
  
3) A board should come out which asks you the Width and Height of the new image and there is a box which helps to change it properly. You may unchecked the box near it but, the quality of the image will break down. The current size of my image is 468x600 and I will change it to 960x1231 (computer suggested the height according to the new width)

Pixlr zoom and Image size

II. Way

 1) Click to Edit button over the black stripe on the upper part of the site. Afterwards, click the Free Transform (Shortcut: CTRL + T)

Pixlr Edit Menu


2) Then use the blue boxes to expand and narrow the image size.

Pixlr resizing


3) After narrowing the image size background will be white as a frame. To remove this use technique that you learned in the first lesson.(Crop Tool)

Yandex.Metrica